Factory Direct Models General Aviation Aircraft Order Form Help
The Order Form is divided into nine (9) Sections, each Section requires different information about the Aircraft you are ordering. Let’s get started. You will notice a Progress Bar at the top of each Section that keeps you informed on your progress while completing the form.
Every Section has three Buttons at the bottom of the Window with an exception of SECTION NINE (9) – GENERAL COMMENTS.
-
SAVE & CONTINUE LATER – This Button allows you to discontinue with the form and save it for later use. You will receive an email with the link to retrieve the Order Form from the last entry.
-
SKIP & RETURN LATER – This Button allows you to skip this section and brings you to the next section. You will need to return to the skipped section and complete the information prior to submitting your Order Form.
-
NEXT SECTION – Once you have completed the Section One click on the NEXT SECTION Button and you will automatically be brought to an option screen where you can choose if your aircraft has a Propeller or is Jet Powered. If you select your aircraft has a Propeller you will automatically be brought to SECTION TWO. If your Aircraft is Jet Powered you will be brought to Section Three. Should you choose the wrong selection simply use your browser back button and you to the previous page.
Section 1 - Aircraft Specifications
NOTE - ALL FIELDS ARE REQUIRED
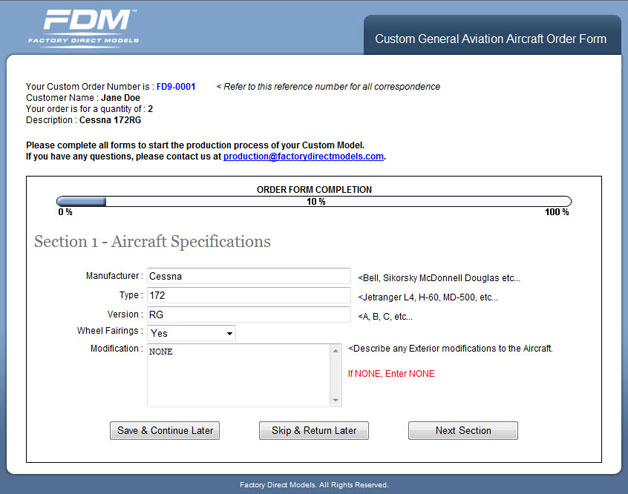
Most Aircraft Manufactures utilize an Industry Standard of Model, Type and Version (MTV) to identify the aircraft they produce. An example would be Cessna 172 RG. The Manufacture is Cessna, the Model is 172 and the Version is RG.
Manufacturer: This field requires the Aircraft’s Manufacturers name of the Model you are ordering. Some examples are; Cessna, Beechcraft, Bombardier, Learjet, Boeing, Airbus, Piaggio, Piper etc. If you’re not sure of the Manufacture’s name you can search using the Registration number of the Aircraft through Federal Aviation Administration or by Google.
Type: This field requires the type of aircraft you want your model to emulate. Some examples are; 172, 350, A320 etc. If you are not sure of the aircraft type you can search using the Registration Number of the Aircraft through Federal Aviation Administration or by Google.
Version: This field requires the aircraft version of the Model you are ordering. Not all aircraft have a Version. If your aircraft does not have a version type the word NONE in the Field. Aircraft Versions can be numerical or letters. Some examples are H, D, and C etc. If you are not sure if your aircraft has a Version you can search using the Registration number of the Aircraft through Federal Aviation Administration or by Google.
Wheel Fairings: This Field has a drop down menu for you to select if your aircraft has Wheel Fairings. If your aircraft has Wheel Fairings select “Yes” otherwise select “None”.
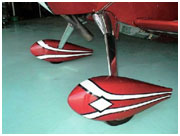
Modification: Any modifications that were added on from the standard production aircraft should be explained here. Some examples are Antennas (GPS), Raisbeck Modifications (King Airs. Lear Jets), Wing Vortex Generators etc.
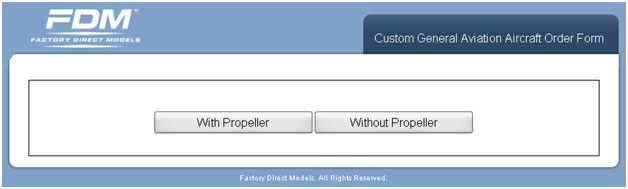
Once Section One is complete click on the “Next Form Button” to proceed to the next Window. The below Window will appear. Here you can choose if the Aircraft you are ordering has a Propeller or without a Propeller. Clicking on the Propeller Button will bring you to Section Two “Propeller Description”. Clicking the without Propeller brings you to Section Three. This Section refers to “Aircraft Colors”.
Section 2 - Propeller Description (This Section is only applicable to Propeller Powered Aircraft)
NOTE - ALL FIELDS ARE REQUIRED
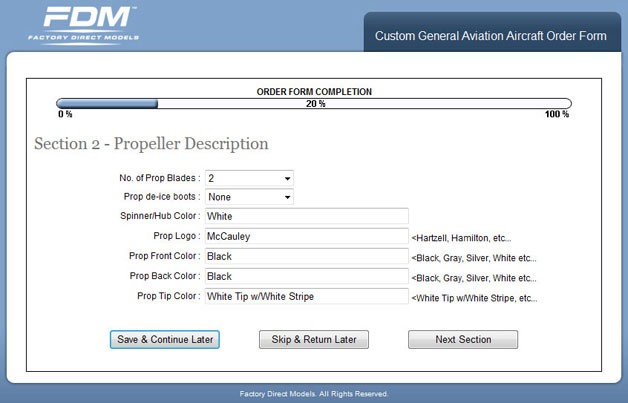
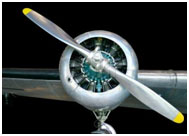
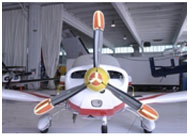
No. of Prop Blades: Select the number of blades your Aircraft has.
 |
 |
Example of a 2 bladed prop. |
Example of a 3 bladed prop. |
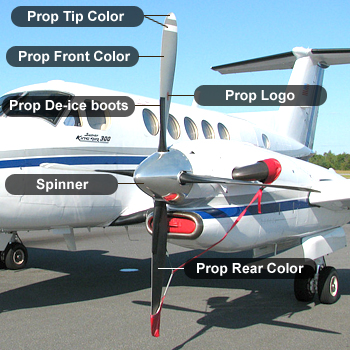
Prop de-ice boots: In this field select if your Propeller has De-ice Boots installed. If “Yes” select “Yes” in none select “None”.
Spinner/Hub Color: In this field please let us know the Color/Polished of the Spinner or Hub.
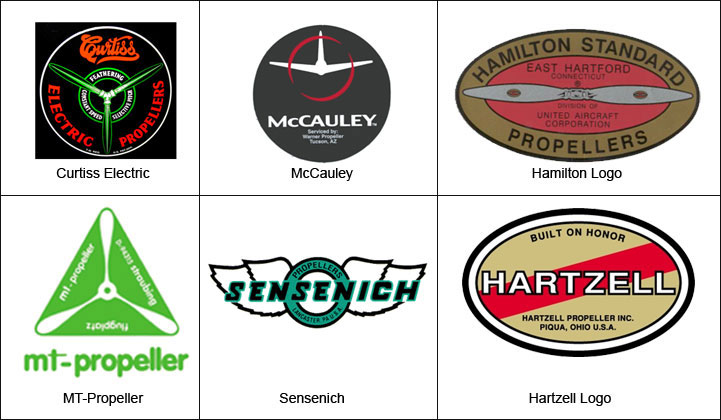
Prop Logo: In this field you can let us know if your Propeller has a Logo installed on the Blades, Some Examples are Hartzell, McCauley and Hamilton.
Prop Front Color: In this field please let us know what color the front of the propeller is.
Prop Back Color: In this field please let us know what color the rear of the propeller is.
Prop Tip Color: If your propeller has tip colors or stripes please let us know the colors.
Here are some Propeller Logo Examples.
NOTE - ALL FIELDS ARE REQUIRED
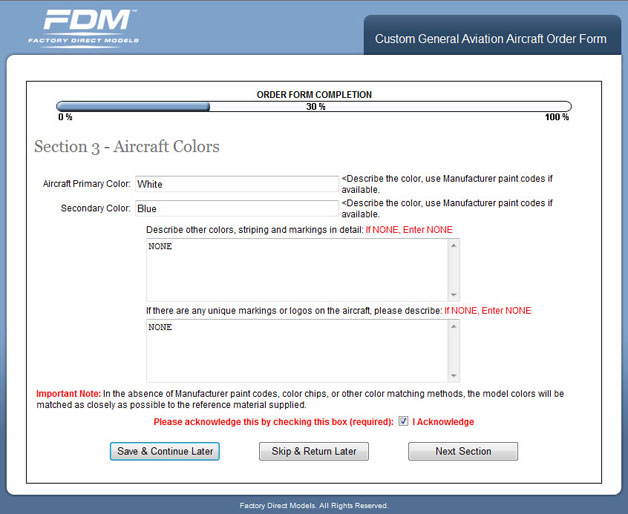
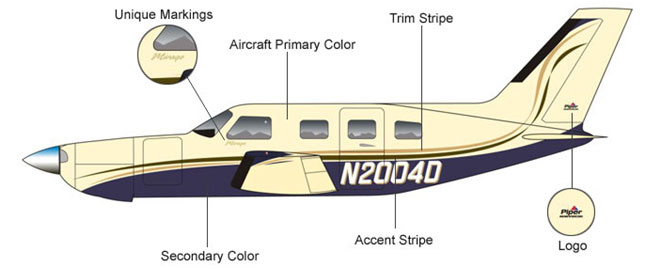
Aircraft Primary Color: In this field you can tell us the Primary Color of your aircraft. Supplying the Manufacture’s Paint Codes are a great help. If you can’t provide the Paint Codes our Artists can match the color from the Photographs you supply, however, you will need to give us permission for color matching from Photographs.
Secondary Color: In this field you can tell us the Secondary Color of your aircraft. Supplying the Manufacture’s Paint Code is a great help. If you can’t provide the Paint Codes our Artists can match the color from the pictures you supply.
Describe other colors, striping and markings in detail: In this field you can tell us the accent stripes color of your aircraft. Supplying the Manufacture’s Paint Code is a great help. If you can’t provide the Paint Codes our Artists can match the color from the pictures you supply.
If there are any unique markings or logos on the aircraft, please describe: In this field we need for you to describe any unique markings or logos on both sides of the Aircraft.
Important Note: You need to check the “Please Acknowledge” Check Box giving permission for our Artists to match the colors of your aircraft to the best of their ability from the Photographic material you supply.
Section 4 - Registration Information
NOTE - ALL FIELDS ARE REQUIRED
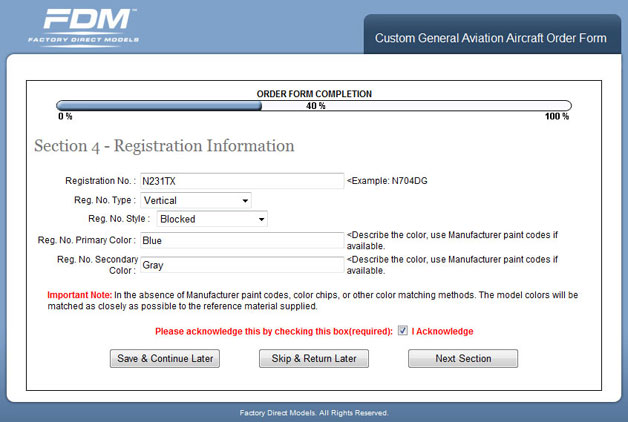
Registration No.: In this field we require you put the Aircraft Registration number. Example N704DG
Reg. No. Type: In this drop down menu field we require you to select if your Registration type is Vertical or Slanted.
Reg. No. Style: In this drop down menu field we require you to select if your Registration Number Style is Blocked, Shadowed, Outline or Drop Shadow if Others please describe.
Other: If you select other on the drop down menu then please describe.
Here is an example of Aircraft Registration Number
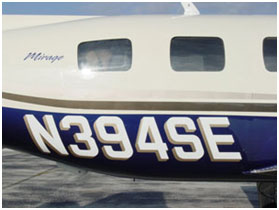
Below is an example of Reg. No. Type

Below are examples of Reg. No. Style

Once Section Four is complete click on the “Next Form Button” to proceed to the next Window. The below Window will appear. Here you can choose if you would like to include a Logo on the Base Stand of your Model. Clicking “Yes” brings you to Section Five where you can tell us the Logo you would like.
![]()
Clicking the “No” Button will bring you to another Window asking if you would like to include an Inscription Plaque on the Base.
Section 5 - Display Stand Logo
NOTE - ALL FIELDS ARE REQUIRED
![]()
Display Stand Logo: Please select Manufacture’s Logo, Company Logo, Other or None from the drop down menu.
Manufacturer Logo: If you select this from the Drop down Menu then we will automatically put the Manufacturer’s Logo of the Aircraft e.g. Cessna.
Company Logo: If you select this from the Drop Down menu then you will have the ability to upload your company Logo. The Text Box now becomes a Required Field. Please write a few words to help us emulate the of your Company. Colors of the Logo are important.
Other: If you select Other from the Drop down Menu then you will have the ability to upload a Logo of your choice. The Text Box now becomes a Required Field. Please write a few words to help us emulate the Logo of your choice. Colors of the Logo are important.
Manufacturer's Logo
![]()
Here are some examples of Manufacturers Logo:
![]()
Once “SECTION FOUR” is complete click on the “Next Form Button” to proceed to the next Window to tell us what you would like to see on an Inscription Plaque. The Inscription Plaque Window will appear. Here you can choose if you would like to include an Inscription Plaque on the Base Stand of your Model. Clicking “Yes” brings you to “SECTION FIVE” where you can tell us the Logo you would like.
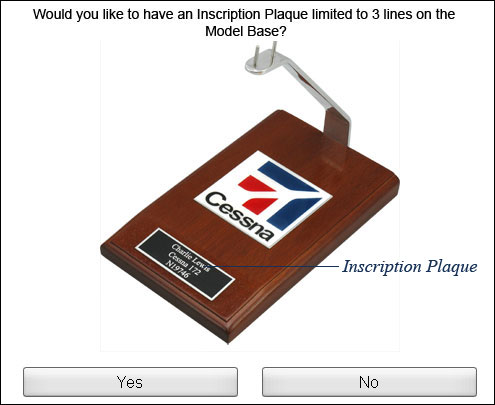
Select if you choose to have an Inscription Plaque or Not. Clicking the “Yes” Button will bring you to Section Six where you can record what you would like to have on the Inscription Plaque. Clicking the “No’ Button will bring you to Section Seven “Aircraft Images Up Load”
Section 6 - Inscription Plaque Text

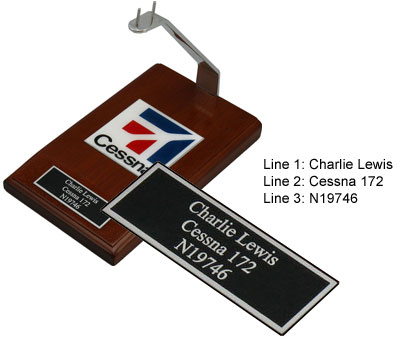
NOTE: We can only accommodate 15 characters per line.
Section 7 - Aircraft Images Upload/Attach
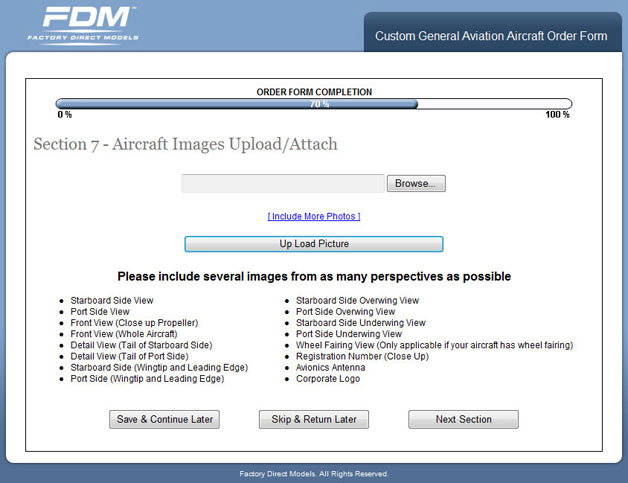
This section gives you the opportunity to up load Photographs of your Aircraft. You may Up Load as many as you like. To assist our Artist we suggest taking Photographs from the Aircraft Sections as seen in the Window Example. The more Photographs you provide the easier it will be for our Artists to replicate your Aircraft.
Clicking the Browse will allow you to locate Photographs you may have stored on your computer. Once you locate these Photographs Double Clicking the Photograph will put the path in the Browse Box. To add another Photograph click on the [Include More Photos] Link and another Browse Button and Path Field will appear. You may continue to click on the [Include More Photos] Link as many time as you wish for the Photographs you want to Up Load. Once you have selected all the Photographs you want to up load click on the “Up Load Picture Button and Thumbnails of the Photographs will appear.
Clicking the “Next Section” button without Up Loading any Photographs will give you a message in red “You did not Up Load any Photographs/Pictures. Will you be sending this material via Postal Service? A required Field Check Box will appear with the word “Yes” next to it. Clicking the “Yes Check Box” indicates that you will be sending Photographs of you Aircraft via Postal Service. You may now Click the “Next Section Button” to proceed to SECTION EIGHT – INBOUND MATERIAL.
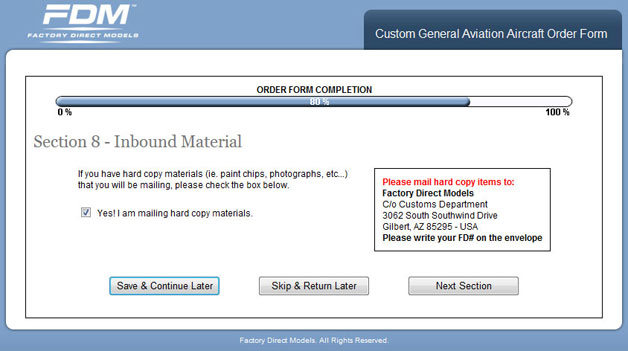
If you have hard copy materials (i.e. paint chips, photographs, etc...) that you will be mailing, please check the box “Yes! I am Mailing Hard Copy Materials”. If not you may skip this Section and Click the “Next Section” Button.
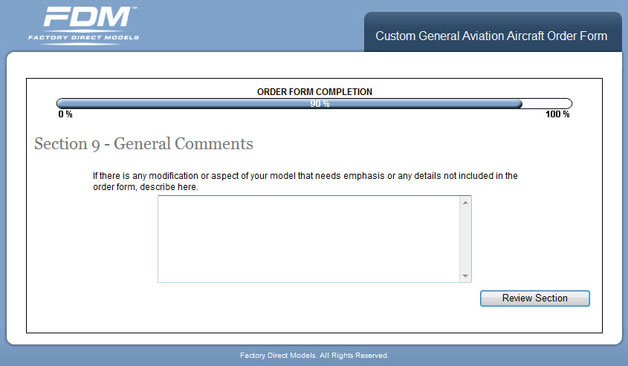
If there are any modifications or aspects of your Model that needs emphasis or any details not included in the order form, please describe them here. Please be as detailed as you can to ensure that your Model will be made according to your specifications.
Preview & Edit Your Order Form
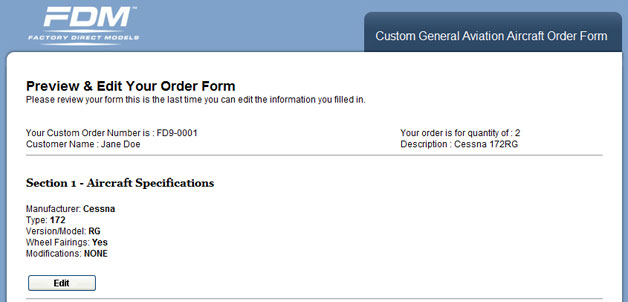
Once your Order Form is completed you now have the ability to Edit the information by Clicking on the “Edit” button. The completed Order Form will appear and each Section has an Edit Button that when Clicked puts your Order Form into the edit mode.
You will have the capability to edit all your recorded data per Section. To Edit Recorded Data go to the Section you want to edit and click the “Edit” button, The “Edit Button” is located on the bottom left side of each Section. Once you are done editing a specified field on a Section Click on the “Save” button located on the bottom left side of the Edit page. Clicking the “Save” button will save the data you have edited and also will take you back to the Preview & Edit Your Order Form so you can once again review your Order Form. If you are 100% sure that the data you recorded on the Order Form is correct you can Print a Copy of the Completed Order Form by Clicking on the “Print Copy” Button located on the bottom left side of the Preview & Edit Your Order Form page. To send your Completed Order Form click on the “Send My Order Form” button located on the bottom right side of the Preview & Edit Your Order Form Page.
Once you have successfully sent your Order Form an email will be sent to your email confirming that you have successfully submitted the Order Form and your Model will be in Production.